
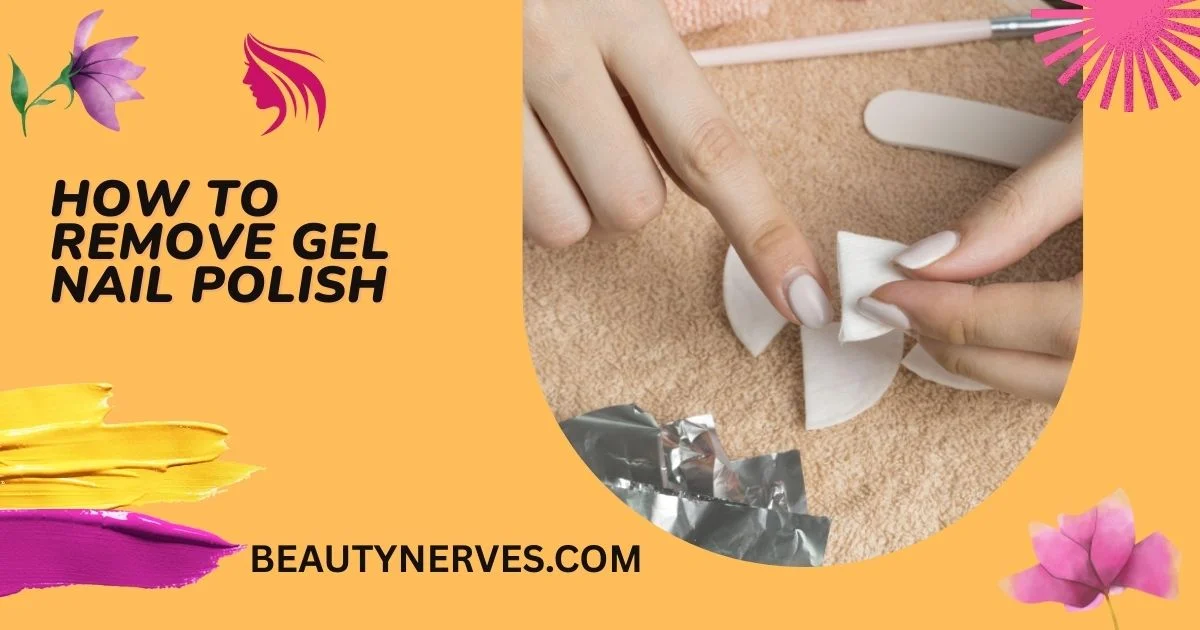
Learning how to remove gel nail polish properly can save your nails from unnecessary peeling, scraping, and filing. The safest at-home method for soak-off gel polish uses acetone, cotton, and a little patience.
Gel polish is designed to last longer than regular nail polish, so it does not simply wipe away with ordinary remover. Trying to peel it off can take layers of your natural nail with it. Dermatologists recommend softening the gel first and then gently removing the loosened product.
If you are building a better nail-care routine, the Nails Guide covers the basics of nail care, styles, treatments, and common nail terms.
Table of Contents
What Is Gel Nail Polish?
Gel nail polish is a nail coating that is cured under a UV or LED lamp. The curing process makes the polish harder and more durable than traditional nail polish.
A gel manicure can look fresh for much longer than a regular manicure. The downside is that the cured coating needs a different removal process.
Most soak-off gel polish can be removed with acetone. Other products, such as some hard gels, are not designed to dissolve in acetone and may need to be filed down professionally.
Before removing your manicure, it helps to understand the different options. This Nail Types Guide can help you compare common nail styles and systems.
Quick Answer: How to Remove Gel Nail Polish
To remove soak-off gel nail polish at home, gently roughen the shiny surface, protect the skin around your nails with petroleum jelly, place acetone-soaked cotton over each nail, and wrap the fingertips.
Leave the wraps on for about 10 minutes, then gently rub away the softened gel with a warm, damp washcloth. If the gel remains firmly attached, do not scrape it. Apply acetone again and give it more time.
The American Academy of Dermatology recommends 100% acetone and warns that picking or aggressively filing gel polish can damage the nails.
Key Takeaways
- Use 100% acetone for soak-off gel polish.
- Protect the skin around your nails with petroleum jelly.
- Lightly roughen the gel’s surface before soaking.
- Use small pieces of cotton that fit each nail.
- Wrap each nail securely without making the wrap too tight.
- Allow enough time for the gel to soften.
- Never peel or force gel polish from the nail.
- Avoid aggressive filing and sharp tools.
- Wash your hands after removal.
- Moisturize your nails and cuticles afterward.
- Consider a break from gel manicures if your nails become brittle or damaged.
What You Need to Remove Gel Nail Polish
The good news is that you do not need a large collection of products.
| Supply | Purpose |
|---|---|
| 100% acetone | Softens soak-off gel polish |
| Cotton balls or strips | Holds acetone against the nail |
| Petroleum jelly | Protects surrounding skin |
| Nail file | Breaks through the shiny top layer |
| Plastic food wrap | Holds cotton securely in place |
| Scissors | Cuts cotton and wrap to size |
| Warm, damp washcloth | Removes softened gel |
| Mild soap | Cleans the nails afterward |
| Hand cream or petroleum jelly | Moisturizes dry skin |
| Towel | Protects your work surface |
The AAD’s dermatologist-recommended method includes petroleum jelly, cotton, 100% acetone, plastic food wrap, a washcloth, and a towel.
Before You Start: Check What Type of Gel You Have
Not every gel product can be removed in exactly the same way.
This is one of the most important steps because trying to soak off a product that is designed to be filed away can waste time and lead to excessive scraping.
Soak-Off Gel
Soak-off gel polish is designed to soften when exposed to acetone.
This is the type most suitable for the at-home cotton-and-acetone method described in this article.
Hard Gel
Hard gel is different.
Some hard gel systems do not dissolve in acetone. They usually need to be carefully filed down, and removing them incorrectly can damage the natural nail.
If you are unsure what product you have, ask the nail technician who applied it before attempting removal.
You can learn more about the differences in our Hard Gel Nails guide.
Gel Extensions and Artificial Nails
If your manicure includes extensions, tips, builder gel, or another artificial nail system, the removal process may be different.
Do not assume that every product should be soaked in acetone.
For example, acrylic nails have their own removal process. You can learn more in this Acrylic Nails Guide.
How to Remove Gel Nail Polish Step by Step
Step 1: Prepare Your Workspace
Acetone can damage some countertops, furniture, and other surfaces.
Cover your workspace before you start. A towel over a protective layer can help prevent accidental spills from reaching the surface underneath.
Work somewhere with good ventilation.
Keep acetone away from flames, sparks, and unnecessary sources of heat.
Step 2: Gather Everything First
Have all your supplies within reach before starting.
This includes:
- Acetone
- Cotton
- Petroleum jelly
- Nail file
- Plastic wrap
- Scissors
- Warm water
- Washcloth
- Mild soap
- Moisturizer
Working on one hand at a time is easier because you still need one free hand to handle the materials.
Step 3: Trim Long Nails if Needed
If your nails are very long, you can trim them slightly before starting.
Shorter nails are easier to wrap and can be less likely to catch on clothing while the manicure is being removed.
Do not cut the nails extremely short.
Step 4: Lightly File the Top Layer
Take a nail file and gently remove the glossy surface of the gel.
You are not trying to remove the gel completely.
The purpose is simply to break the smooth top layer so the acetone can reach the product more effectively.
Use light pressure.
Once you get close to your natural nail, stop.
Do not keep filing just because you can still see some color.
The goal is to remove the gel safely, not to make the natural nail perfectly bare with a file.
Step 5: Protect the Skin Around Your Nails
Apply a thin layer of petroleum jelly around each nail.
Focus on the cuticle and surrounding skin.
Try not to cover the actual gel polish.
Petroleum jelly helps create a barrier between the skin and acetone. The AAD recommends this step as part of its home gel-removal method.
Step 6: Cut the Cotton to Fit Your Nails
Cut small pieces of cotton that are approximately the size of each nail.
There is no reason to cover your entire fingertip with acetone-soaked cotton.
Smaller pieces keep the acetone focused on the nail and reduce unnecessary skin contact.
The AAD specifically recommends cotton pieces that are approximately the size of each nail.
Step 7: Soak the Cotton in Acetone
Saturate each piece of cotton with 100% acetone.
The cotton should be thoroughly wet but does not need to drip.
Place it directly over the gel.
Step 8: Wrap Each Nail
Cover the cotton with plastic food wrap.
The wrap should hold the cotton firmly against the nail.
Do not wrap your fingertips so tightly that they become painful, numb, or uncomfortable.
The AAD recommends plastic food wrap because it can create a tighter seal and reduce dripping compared with some other wrapping methods.
Step 9: Wait About 10 Minutes
This is the part where patience matters.
Leave the wraps in place for around 10 minutes.
When you remove the wrap, most or all of the gel may have softened enough to come away.
Some products may take longer.
If the gel is still hard, do not start scraping aggressively.
Wrap the nail again with fresh acetone-soaked cotton and give it more time.
Step 10: Remove the Softened Gel
Remove the plastic wrap and cotton.
Take a washcloth, run it under warm water, and gently rub the remaining softened gel from the nail.
The AAD recommends this approach instead of using an orange stick or aggressively scraping the nail.
If a section does not come away easily, stop.
It may need more acetone.
Step 11: Wash Your Hands
After the gel is gone, wash your hands with mild soap and water.
A gentle or fragrance-free soap can be useful if your skin is sensitive.
This removes remaining acetone and residue.
Step 12: Moisturize Your Nails and Cuticles
Finish by applying petroleum jelly, cuticle oil, or a rich hand moisturizer.
Pay particular attention to the cuticles and skin surrounding the nails.
The AAD recommends moisturizing the cuticles and surrounding skin after gel removal and suggests applying petroleum jelly daily for several days to reduce irritation from acetone.
Why You Should Never Peel Gel Nail Polish
Peeling may look like the fastest removal method.
It is also one of the easiest ways to damage the natural nail.
When gel is firmly attached to the nail, pulling it away can remove some of the nail’s surface layers with it.
That can leave the nail:
- Thin
- Rough
- Weak
- Peeling
- More likely to break
- Sensitive to everyday pressure
The AAD specifically advises against picking at gel polish because picking and scraping can damage the nails.
So if you notice a loose edge, resist the temptation to pull it.
Remove the manicure properly instead.
Can You Remove Gel Nail Polish Without Acetone?
Yes, products marketed as acetone-free removers exist, but they are not always suitable for cured gel polish.
Acetone is the most effective common method for removing soak-off gel polish at home.
The bigger concern is what happens when someone tries to avoid acetone by filing, scraping, or peeling the gel aggressively.
That can damage the natural nail.
If you cannot use acetone because of a known sensitivity or other concern, ask a qualified nail professional about the safest removal option for your particular product.
Can You Use Regular Nail Polish Remover?
Regular nail polish remover may work well for traditional nail polish, but it is generally not the right choice for cured gel polish.
Gel polish is designed to resist everyday solvents and wear.
That is one reason it lasts longer.
If you are interested in traditional nail color, see our guide to nail polish for more information about regular polish and nail-color options.
How Long Does Gel Nail Polish Take to Remove?
A simple soak-off removal can take around 20 to 30 minutes when you include preparation, soaking, cleanup, and aftercare.
The actual acetone-wrapping stage can take around 10 minutes according to the AAD’s home removal method.
| Stage | Approximate time |
|---|---|
| Prepare supplies | 3–5 minutes |
| Lightly file surface | 2–5 minutes |
| Apply petroleum jelly | 1–2 minutes |
| Apply cotton and wraps | 5 minutes |
| Soak | About 10 minutes |
| Remove residue | 3–5 minutes |
| Wash and moisturize | 2–3 minutes |
These are estimates.
A thicker or different gel system may require more time.
The important thing is not to force the product off simply to finish faster.
How to Remove Gel Nail Polish Without Damaging Your Nails
There is no removal method that guarantees zero nail or skin irritation. However, you can reduce unnecessary damage by using the right technique.
Use Small Amounts of Cotton
Cut the cotton to approximately the size of each nail.
This keeps the acetone focused where you need it.
Protect the Skin
Petroleum jelly can reduce direct acetone contact with the surrounding skin.
Do Not Soak Your Whole Hand
There is usually no need to place your entire hand in a bowl of acetone.
Using cotton directly on the nails limits unnecessary exposure.
The AAD recommends limiting acetone exposure to the fingertips or using cotton on the nails rather than soaking the entire hands.
Avoid Sharp Tools
Do not use:
- Knives
- Blades
- Scissors to scrape the nail
- Metal picks
- Sharp manicure tools
These tools can injure the nail or surrounding skin.
Do Not Buff Aggressively
After removing the gel, your nails do not need to be aggressively buffed until they are perfectly smooth.
Over-buffing can thin the nail.
What If the Gel Will Not Come Off?
This is a common problem.
The first thing to check is whether you have the correct type of product.
If you are using soak-off gel polish and it remains hard, try these steps:
- Lightly roughen the shiny surface again.
- Apply fresh acetone-soaked cotton.
- Make sure the cotton covers the entire nail.
- Secure the wrap firmly.
- Wait another 5 to 10 minutes.
- Check whether the gel has softened.
- Gently rub the softened product away.
If it still will not soften, stop trying to force it.
You may have a hard gel or another product that is not designed to soak off.
What Happens to Your Nails After Gel Removal?
Your nails may look dry or feel slightly different after a gel manicure.
Repeated gel manicures can also be associated with nail brittleness, peeling, and cracking, particularly when removal or application is rough.
That does not mean every gel manicure will damage your nails.
How the product is applied, how it is removed, how often you use it, and the condition of your nails all matter.
If you regularly wear gel polish, pay attention to what your bare nails look like after removal.
How to Care for Nails After Gel Polish Removal
Moisturize Your Cuticles
Acetone can dry the surrounding skin.
Apply petroleum jelly or a moisturizing product to your cuticles and the skin around your nails.
Keep Your Nails at a Comfortable Length
If your nails feel weak after removal, keeping them slightly shorter can reduce catching and breakage.
Avoid Picking
If you notice a rough edge, do not pull at it.
Use a gentle nail file if appropriate, or have a professional take a look.
Consider a Polish Break
The AAD recommends taking breaks from gel manicures, especially if you are experiencing nail problems. It also recommends moisturizing the nails and cuticles between manicures.
A break also gives you a chance to inspect your natural nails.
Look for Unusual Changes
Pay attention to:
- Persistent pain
- Swelling
- Unusual discoloration
- Nail lifting
- Significant thinning
- Cracking
- Changes in the surrounding skin
- Persistent irritation
If you notice an unusual or persistent nail problem, consider seeing a dermatologist.
Is Gel Polish Bad for Your Nails?
Gel polish is not automatically harmful to everyone, but frequent use and poor removal can create problems.
The AAD says gel manicures can contribute to brittleness, peeling, and cracking. It also recommends moderation and breaks between manicures when needed.
For a deeper look at the topic, read Is Gel Polish Bad for Your Nails?.
This is especially useful if you are trying to decide whether to continue using gel manicures or switch to traditional polish.
Gel Polish vs. Shellac
People often use “gel” and “Shellac” as if they are exactly the same thing.
They are not necessarily identical.
Shellac is a branded nail product system, while gel polish is a broader category of cured nail products.
The exact removal process depends on the product used.
If you regularly get Shellac manicures, check the product information or ask your nail technician about the correct removal method.
You can learn more in our Shellac Nails guide.
Gel Polish vs. Hard Gel
This difference is particularly important when removing your manicure.
| Feature | Soak-Off Gel Polish | Hard Gel |
|---|---|---|
| Cured under a lamp | Yes | Yes |
| Designed to soak off | Usually | Usually no |
| Acetone removal | Generally works | Often ineffective |
| Filing required | Minimal | Often required |
| Best home approach | Acetone soak | Professional removal may be safer |
Do not assume that because two products are both called “gel,” they can be removed in the same way.
Gel Polish vs. Acrylic Nails
Acrylic nails are a different type of artificial nail enhancement.
Acrylic systems add structure and can be used to create longer nails. Gel polish is generally a color coating placed over the natural nail or another enhancement.
The removal methods can also differ.
If you are switching from gel to acrylic, read our Acrylic Nails Guide first.
You can also learn about how to remove acrylic nails if acrylic is your next manicure choice.
Can You Remove Gel Polish While It Is Lifting?
You can remove a lifting gel manicure, but you should not simply peel the loose product away.
Lifting can create an opening between the coating and the natural nail.
Pulling at that area can take part of the natural nail with it.
If the manicure is significantly lifting, damaged, or causing discomfort, professional removal is a safer option.
When Should You Get Professional Gel Removal?
At-home removal is not always the best choice.
Consider seeing a nail professional if:
- You do not know what product was applied.
- The gel does not soften with acetone.
- You have hard gel.
- You have extensions.
- The nail is cracked.
- The nail is painful.
- The nail is lifting from the nail bed.
- You have repeatedly damaged your natural nails.
- The product was applied over an injured nail.
- You are tempted to scrape or file aggressively.
A professional can identify the product and use the appropriate removal technique.
Common Gel Polish Removal Mistakes
Mistake 1: Peeling the Gel
Problem: You may remove layers of the natural nail.
Better option: Soften the gel with acetone first.
Mistake 2: Filing Until the Nail Looks Bare
Problem: You can accidentally file the natural nail.
Better option: File only the surface of the gel.
Mistake 3: Scraping With a Metal Tool
Problem: Scraping can injure the nail.
Better option: Re-soak stubborn areas.
Mistake 4: Soaking the Entire Hand
Problem: It increases unnecessary skin exposure to acetone.
Better option: Use small acetone-soaked cotton pieces on the nails.
Mistake 5: Rushing the Soaking Process
Problem: Hard gel is harder to remove safely.
Better option: Give the acetone enough time to soften the product.
Mistake 6: Skipping Aftercare
Problem: Your skin may feel dry after acetone exposure.
Better option: Wash your hands and moisturize your nails and cuticles.
Expert Tips for Easier Gel Removal
Tip 1: Remove One Hand at a Time
It is much easier to wrap your nails when you still have one free hand.
Tip 2: Cut Cotton Before Applying Acetone
Prepare the pieces first.
That way, you are not trying to cut cotton while your other hand is covered in acetone.
Tip 3: Use a Good Seal
The cotton should remain pressed against the nail throughout the soaking period.
Tip 4: Do Not Make the Wrap Too Tight
A secure wrap is useful.
A painful wrap is not.
Your fingertips should remain comfortable.
Tip 5: Keep Your Workspace Protected
Acetone can damage certain surfaces, so prepare your workspace before opening the bottle.
Tip 6: Moisturize After Removal
Simple aftercare can make your hands and cuticles feel much better after the removal process.
Tip 7: Give Damaged Nails a Break
If your nails repeatedly become brittle or peel after gel manicures, consider taking a break.
Nail Care Checklist After Gel Removal
Use this checklist after removing your manicure:
- Wash hands with mild soap.
- Dry your hands gently.
- Apply cuticle oil or petroleum jelly.
- Moisturize your hands.
- Keep weak nails shorter.
- Avoid picking at rough edges.
- Avoid aggressive buffing.
- Inspect the bare nails.
- Give damaged nails time to recover.
- Seek professional advice if changes persist.
How to Make Your Next Gel Manicure Easier to Remove
Removal starts before the manicure is even applied.
When getting your next gel manicure, ask what type of gel product is being used.
If you prefer an at-home removal option, ask whether it is a soak-off gel.
You can also ask your nail technician about proper removal before the manicure is applied.
This simple question can prevent confusion later.
For more information about gel application, see our guide on how to apply gel nail polish.
What About Chrome, French, and Other Gel Designs?
Nail art does not necessarily change the basic removal process.
A French manicure, chrome design, or seasonal nail look may still use a gel base underneath.
The key question is what product was used to create the manicure.
For inspiration before your next appointment, explore our French Nails Guide, Chrome Nails Guide, and Seasonal & Festive Nails guide.
Once you understand the base product, you can enjoy the design without guessing about removal later.
What Are the Pros and Cons of Removing Gel Polish at Home?
| Pros | Cons |
|---|---|
| Convenient | Takes time |
| Can be done without a salon appointment | Acetone can dry the skin |
| Supplies are simple | Incorrect removal can damage nails |
| Easy once you learn the process | Some gel products cannot be soaked off |
| Can save money | Strong acetone smell can be unpleasant |
The biggest benefit is convenience.
The biggest risk is impatience.
If you remove gel slowly and avoid peeling or aggressive scraping, you can reduce unnecessary damage.
Final Verdict: Remove Gel Polish With Care
Knowing how to remove gel nail polish is just as important as knowing how to apply it.
The basic process is simple: identify the product, lightly roughen the surface, protect your surrounding skin, apply acetone-soaked cotton, wrap the nails, wait for the gel to soften, and gently remove the residue.
The biggest mistake is trying to speed things up by peeling or scraping.
If the gel does not come away easily, stop and soak it again. If you have hard gel, extensions, or an unknown product, professional removal may be the better option.
After removal, wash your hands and moisturize your nails and cuticles. If your nails are repeatedly becoming thin, brittle, cracked, or painful, give them a break and consider speaking with a dermatologist.
Frequently Asked Questions
What is the safest way to remove gel nail polish?
For soak-off gel polish, the safest common at-home method is to use 100% acetone with small pieces of cotton and a secure wrap. Allow the gel to soften before gently removing it.
Is acetone bad for your nails?
Acetone can dry and irritate the surrounding skin, and repeated removal can contribute to nail problems. Limit exposure to the nail area and moisturize afterward.
Can I peel off gel nail polish?
You should not peel gel polish from the nail. Pulling firmly attached gel can remove layers of the natural nail and leave it thin or damaged.
Should I file gel polish off?
Lightly filing the shiny top layer can help acetone work, but aggressively filing all the way down to the natural nail can cause damage. Some hard gels require professional filing.
Why is my gel polish not coming off?
The product may need more soaking time, or it may not be a soak-off gel. If fresh acetone does not soften it after repeated attempts, avoid scraping and ask a nail professional to identify the product.
When should I stop doing gel manicures?
Consider taking a break if your nails become brittle, peel, crack, or show other persistent changes. The AAD recommends moderation and nail-care breaks when needed.