I never thought I’d be obsessed with clumpy lashes, but here I am, layering on mascara like it’s an art form. The first time I saw spider lashes, I wasn’t sure if it was genius or a mistake. Thick, spiky, and a little messy—yet somehow, they made the eyes pop.
Then I noticed them everywhere. Runways, red carpets, even my favorite influencers flaunting them like they just woke up looking that bold. Turns out, this isn’t new. The ‘60s had Twiggy, and now, we have our own version of the trend. And honestly? I’m all in.
Read More: Eye Makeup Looks: Stunning Styles for Every Occasion
Disclosure: This post contains affiliate links. If you purchase through these links, I may earn a small commission at no extra cost to you.
Table of Contents
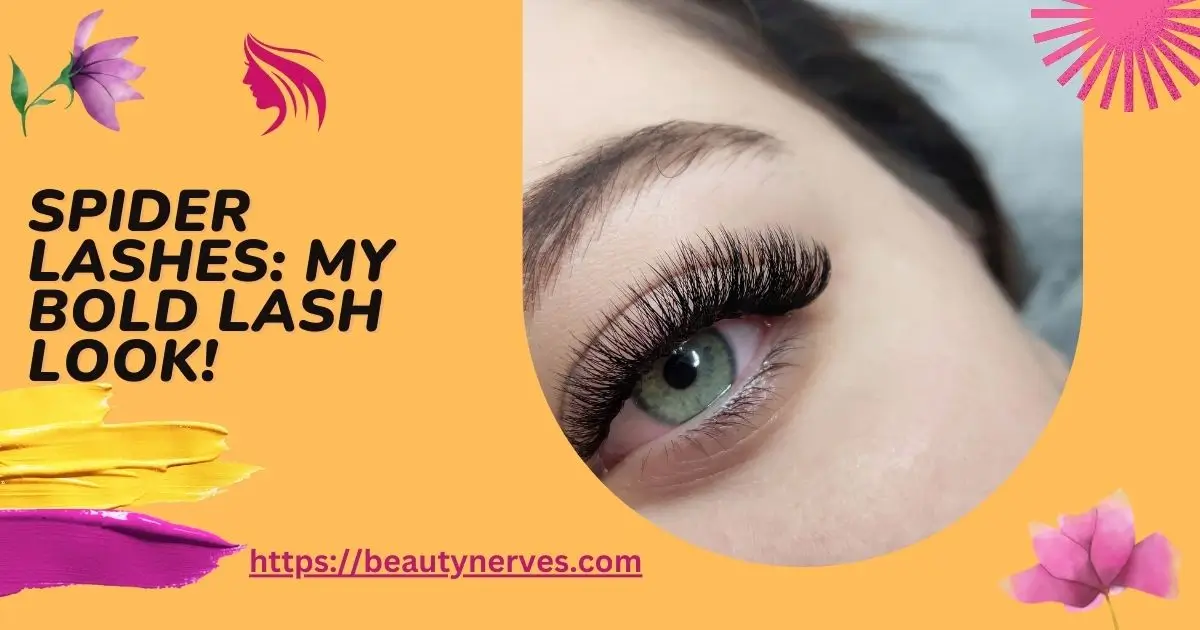
How I Helped Perfect the Spider Lashes Look
With a love for bold lashes, I helped a friend perfect the spider lashes look. She struggled with clumpy mascara, but together, we perfected the technique for that dramatic, edgy style. The final result was stunning, showcasing long, separated lashes that added a fierce vibe to her look.
Read More: Eye Makeup Guide: Perfect Your Look with These Easy Tips
The Allure of Spider Lashes: What’s the Buzz?
Thick, bold lashes are making a statement, and I can’t look away. The clumped, spiky look isn’t a mistake—it’s a beauty trend with history.
1. What Are Spider Lashes?
- It’s all about layering mascara for a chunky, dramatic effect.
- Lashes stick together in thick sections, creating bold spikes.
- The goal? A striking, high-fashion look that refuses to be subtle.
2. From Twiggy to Today
- The ‘60s icon Twiggy made clumpy lashes a signature style.
- Fashion runways revived the look, making it edgy and modern.
- Beauty trends may change, but bold lashes always come back.
3. Celebrities Are Loving It
- Doja Cat rocked spider lashes at the MTV VMAs, turning heads.
- Bella Hadid, Rihanna, and other stars are embracing the look.
- If it’s red carpet-approved, I’m definitely giving it a try.
| Spider Lashes |
|---|
| Top Benefits: |
| ✔ Dramatic, voluminous lashes with a bold, spidery effect |
| ✔ Adds length and thickness with a single application |
| ✔ Perfect for creating an intense, bold eye look |
| ✔ Clump-resistant formula for a clean, separated lash look |
| ✔ Available in various shades to suit all makeup looks |
| Customer Ratings: ★★★★☆ (4.4/5) |
| Buy on Amazon |
My Step-by-Step Guide to Achieving Perfect Spider Lashes
Getting this bold lash look is easier than it seems. A few tricks make all the difference.
1. Choosing the Right Mascara
Not all mascaras work for spider lashes. Some are too light, others too clumpy.
- A thick, buildable formula is a must.
- Look for mascaras that add both length and volume.
2. Prepping My Lashes
Starting with a good base makes everything smoother. Skipping this step? Not an option.
- A quick curl lifts and separates lashes.
- Press gently at the root, then move upwards.
3. Layering Like a Pro
This is where the magic happens. The secret? Keep it wet.
- Apply the first coat at the base, wiggling upwards.
- Add more layers while the mascara is still tacky.
- The goal is thick but not dry.
4. Crafting the Signature Spikes
No clumps? No problem. I make them myself.
- Use clean tweezers to pinch lashes together.
- Focus on small sections for a sharp, spiky look.
- The more defined, the better.
5. Sealing the Deal
Patience is key. Rushing this step can ruin everything.
- Let mascara dry completely before blinking too much.
- A final once-over ensures everything stays put.
Removing Spider Lashes: My Gentle Routine
Taking off heavy mascara doesn’t have to be a struggle. A few simple steps make it easy.
- I soak a cotton pad with micellar water and press it over my eyes.
- Holding it for 15-30 seconds helps loosen the mascara.
- Instead of rubbing, I gently swipe down to avoid pulling my lashes.
- A mild cleanser removes any leftover residue.
- If needed, I go in with a second round to keep my lashes clean.
Tips and Tricks I’ve Learned Along the Way
Spider lashes take patience, but a few tricks help them look better.
- I never let mascara dry between coats—this prevents flaking.
- Using a lash comb helps separate clumps while keeping the spiky effect.
- It took me a few tries to get it right, so I don’t stress over mistakes.
Exploring Variations: Manga Lashes vs. Spider Lashes
Not all dramatic lashes look the same. Some styles give a different vibe.
- Manga lashes have soft, wispy spikes that mimic anime eyes.
- Spider lashes are thicker and more defined, making them bolder.
- Both are fun, but I choose based on the look I want that day.
